Tag Archives: recipe

Cook Zucchini Like This.

I used to not like zucchini. But the other night, I ate an entire zucchini and wanted more. With vegetables, it’s all about where you get them and how you cook them. Out-of-season and over-steamed, it’s easy to say “pass.” Farm fresh and on the grill? Yes please!

Grilled Zucchini Halves | The Fresh Day

I haven’t been grilling as much as I’d like to this year, but the other night made up for it. In addition to some killer beef kebabs, we made what was hands down the best zucchini I’ve ever tasted. A recipe inspired by weeknight laziness, it was also the easiest to make. The zucchini itself is from my farm share, and was tasty enough to eat raw in a salad. But cooked over charcoal, it was charred, soft, sweet, and flavorful. If you have a charcoal grill, you must try cooking your summer squash this way! The same method can be used with a propane grill, but you will miss out on the distinct smokey flavor.

Grilled Zucchini Halves

makes 4 servings

Ingredients
• 4 small zucchini
• olive oil
• salt

1. Heat the charcoal grill to about 400˚F.
2. Cut off the tops of the zucchini and halve lengthwise.
3. Rub the zucchini halves with olive oil (top and bottom) and salt.
4. Place zucchini cut side down on grates.
5. Cook until zucchini begins to char, approximately 8 minutes (the actual time will depend on your grill and the size of the zucchini).
6. Flip the zucchini and continue to cook until soft, about another 7-8 minutes. Remove from the grill and eat warm.

What’s the Story with Ramps? (And How Do I Cook Them?)

Between dining in the city and freelancing for a farm share, I’ve been lucky to try quite a few diverse, delicious, and unique foods. But until this year, the often sought-after ramps have managed to escape me. If you’re familiar with ramps, you might know that they are notoriously tricky to procure. If you aren’t, well, therein lies the reason.

The Fresh Day | What's the Story with Ramps?

So what is the story with ramps? Why do they disappear from farmers markets almost immediately? Why are they coveted by chefs, touted when on menus, and WHY are they illegal in Canada?

No, it’s not because they’re not hallucinogenic or anything. Simply put, ramps have very limited availability. They can’t be grown domestically, and are only found by foraging in the wild. On top of that, they have a very short growing season – sometimes only a few weeks. The scarcity makes them a novelty, but that alone didn’t earn them their reputation. They are also seriously delicious. Ramps taste reminiscent of leeks and garlic, but they are sweet, smooth, and flavorful in a way that is entirely their own. They’re fantastic plain, sauteed in a little olive oil (see my recipe below), but also add a unique tone of flavor into any dish they’re in.

Where can you get your hands on some? I got them in my farm share last week, but they’re also popping up at farmers’ markets around the city, which are finally all open for the season. Try the Rittenhouse or Headhouse markets this weekend – just get there early!

Sauteed Ramps

• 1 bunch ramps
• 1 tbsp olive oil
• salt to taste

1. Clean ramps by placing in a bowl of water and swirling around, letting all the dirt or sand fall to the bottom of the bowl.
2. Once clean, remove and cut off the tip of the bulb with any roots. Leave the rest of the ramps whole.
3. Heat olive oil in skillet (preferably cast iron) over medium heat.
4. Add ramps and sauté in oil for 4-5 minutes, until very soft.
5. Season with salt and serve!

Sauerkraut Stew: A Savory, Sour, Spicy, Sweet Flavor Combination You Need to Try

The first time I made this recipe, it was incredible. The second time I made this recipe, I decided that it was so good, there was no way it couldn’t be shared. While sauerkraut stew isn’t something you hear about often (if ever), it really is the perfect combination of savory, sour, spicy, and sweet.

Sauerkraut Stew | The Fresh Day

This past Christmas, I was lucky to receive a gorgeous fermentation crock so I could make large batches of sauerkraut and kimchi at home. Very large batches. The abundance of sauerkraut left me looking for some new uses for it, so when I saw this soup recipe I had to give it a shot. Using the ingredients I had on hand, I tweaked it and was very happy with the result. There’s a lot that goes into this recipe – sausage, potatoes, mushrooms, tomatoes, and more – but sauerkraut is the namesake for a reason. The delicious tang that sauerkraut offers is what makes this stew such a game changer.

Even though there are a lot of ingredients, this recipe is really easy to make. Different than other soups and stews, you add almost all the ingredients at once and then just simmer. It’s a simple, flavorful, and satisfying one-pot meal.

Sauerkraut Stew | The Fresh Day

Sauerkraut Stew

Makes 6-8 servings

Ingredients:
• 1 large onion, diced
• 8 garlic cloves, chopped
• 1 cup cremini mushrooms, chopped
• 3-4 white or yellow potatoes, diced
• 6 dried apricots, diced
• 3 cups sauerkraut, in brine
• 1 lb of fresh hot sausage, sliced 1/4 inch thick
• 6 cups chicken stock
• 15 oz can crushed tomatoes
• 2 pickled jalapenos (or 1 fresh jalapeno)
• 2 dried chiles, crushed (I used chiles de arbol)
• 2 tsp cayenne
• 1 tbsp paprika
• 1 tbsp caraway seeds
• 2 bay leaves
• sea salt and pepper to taste

1. In a large pot, combine the onion, garlic, mushrooms, potatoes, apricots, sauerkraut, sausage, and chicken stock. Bring to a simmer over medium-high heat, then turn the heat down to medium-low and let cook for 30 minutes.
2. After the 30 minutes, add the tomatoes, peppers, and spices. Let cook for another 20 minutes, or until the potatoes are soft and completely cooked.
3. Add salt and pepper to taste and serve.

Sauerkraut Stew | The Fresh Day

Kitchen Sink Shakshuka

There’s a little place in Old City called Cafe Olé, just around the corner from where my office used to be. It’s one of the best lunch options in the area, mostly because they have plenty of vegetarian, vegan, and gluten-free options. My order was usually a salad, but every time I went in I saw people with a big bowl of what looked like tomato sauce and smelled like heaven. It was only so long before I had to try the dish for myself, and that was my introduction to the wonderful world of shakshuka.

Kitchen Sink Shakshuka | The Fresh Day

Shakshuka is a dish with a diverse ethnic background. Variations exist across different cultures, but it is generally a middle eastern and north African dish. Essentially, it is eggs poached in a tomato stew – a winning combination, but not something I had thought of before. It is traditionally served for breakfast, but for me, it is the perfect meal for anytime.

The basic tomato stew presents an opportunity for lots of additions. I’ve had versions with chickpeas, potatoes, spinach, mushrooms, and more. So when I had farm fresh eggs, a can of tomatoes, and an excess of eggplant that needed to be cooked, shakshuka was the answer. It is a great one pot vegetarian meal, and a flexible recipe to keep on hand when you’re looking to use up the veggies you have left from your CSA share.

Kitchen Sink Shakshuka

Makes 4 servings

Ingredients
• 2 tbsp olive oil
• 1 onion, chopped
• 4 garlic cloves, finely chopped
• 1/2 lb of mixed mushrooms, cleaned and roughly chopped
• 1 spicy pepper, chopped (try a poblano or cubanelle)
• 2 eggplants, roughly chopped
• 1 tsp cumin
• 1 tsp coriander
• 1 tsp paprika
• 1 tsp oregano
• 1/4 tsp cayenne
• 1 28 oz. can of diced plum tomatoes
• salt and pepper to taste
• 6 large eggs
• cilantro for serving

1. Preheat oven to 375ºF.
2. Heat olive oil in a large skillet. Sauté onion until soft, about 5 minutes.
3. Add garlic, mushrooms, and pepper. Let cook for 2 minutes, then add eggplant, cumin, coriander, paprika, oregano, and cayenne. Sauté until all vegetables are soft and cooked through, adding more oil if necessary, about 20 minutes.
4. Pour in can of tomatoes and stir well. Add salt and pepper, then bring to a simmer and cook for 5 minutes.
5. Use the back of a spoon to make small indents in the stew and gently crack an egg into each one. Season each egg with salt and pepper.
6. Carefully transfer the skillet into the oven. Bake for 10 minutes, or until the eggs are set.
7. Sprinkle with chopped cilantro, and serve with bread for sopping up the sauce!

Eggplant & Pattypan Baba Ghanoush

Eggplant and Pattypan Squash

A couple weeks ago, I stumbled upon something truly amazing.

I had just made hummus using Michael Solomonov’s technique for the first time. His most important tip? It’s about the tahini, not the chickpeas. So the following day, I picked up Soom tahini, Solomonov’s brand of choice that is made right here in Philly. Naturally, I had to try some with a spoon when I got home. Holy crap. Soom is so good, my definition of tahini has forever changed. Luckily, Philly Foodworks carries Soom, so I can get it delivered in my CSA every week (but I’m trying not to go through it that fast).

Soom Tahini

Next, I had to figure out what to make with it, immediately. I had also brought home some eggplant and pattypan squash, so I opted to try a non-traditional baba ghanoush. It was a very good decision. Using half eggplant and half summer squash makes for a light, airy, super smooth baba ghanoush. If you don’t have pattypan on hand, try the recipe with zucchini or yellow squash.

Eggplant & Pattypan Baba Ghanoush

Makes about 2 1/2 cups

Ingredients
• 2 small eggplants (about 2 pounds)
• 1 patty pan squash (about 1 pound)
• olive oil for roasting
• 2 cloves of garlic
• juice of 1 lemon
• 1/3 cup of tahini (Soom preferably)
• salt and pepper to taste
• cayenne to taste

Equipment
• blender

1. Preheat the oven to 400ºF. Cut the pattypan squash in half and scoop out the seeds. Rub with oil, and place face down on an oiled pan. Roast for 45 minutes.
2. While the squash is roasting, prepare the eggplant. Keeping eggplants whole, rub the the skin with oil and place on another oiled pan. Once there are 25 minutes remaining for the squash, put the eggplant in the oven as well.
3. Remove both the squash and eggplant from oven once the flesh is very soft and the skin has begun to char. Let cool.
4. Once cooled, scoop out the flesh and put into the blender. Add the garlic, lemon juice, tahini, salt, pepper, and cayenne. Blend until smooth, adding water if necessary to thin out to desired consistency.
5. Transfer the baba ghanoush into a serving bowl and drizzle with additional tahini and olive oil.
6. Serve with pita, and ideally, some Israeli salad.

Quinoa: You’re Probably Cooking It Wrong

Quinoa is nothing new. It’s been in vogue for years now and doesn’t seem to be going away anytime soon. You have probably heard that it’s a complete protein, and maybe even know that it’s not actually a grain, but a seed. There’s a solid list of reasons why quinoa has become so popular, from nutritional benefits to versatility and taste.

I’ve been cooking quinoa for quite some time now, and for too long it never turned out as good as I hoped. Too soft or mushy despite my careful attention to follow the instructions on the package exactly. I tried cooking it for 20 minutes, 15 minutes, 10 minutes, and it still didn’t seem right. What was I doing wrong?

My answer came when I found this article on CNN’s Eatocracy: “We regret to inform you that you’ve been cooking quinoa incorrectly.” Yes I had been! Chances are, you are too.

There’s a couple secrets you need to learn to take your quinoa to the next level:

1. Use half as much water as the recipe calls for.

Yes, really. Halve the amount of water. Most recipes call for 2 cups of water per 1 cup of quinoa, but the 1-to-1 ration actually yields better results. Eatocracy explains:

“When quinoa first started getting popular, there was variability in the product; it wasn’t always fully dried. So importers decided that a 2-to-1 ratio of water to quinoa—when cooked using the absorption method—would be a safe recommendation. This was disseminated as the tried-and-true ratio, but in our testings we found we could cut it in half, seeing as most of the quinoa you can buy today is evenly dried.”

2. Dry-toast the quinoa before cooking.

Add quinoa to the pan – without any oil – and toast it before cooking. Toast quinoa over medium-high heat for about 5 minutes prior to adding any water to bring out a delicious, nutty flavor and prevent bitterness.

Follow the recipe below for the right proportions and technique to ensure your quinoa is top-notch.

Basic Quinoa

Serves 4

Ingredients:
• 1 cup quinoa
• 1 cup water (or broth)
• 1/2 tsp salt

1. Rinse quinoa.
2. Toast quinoa in a medium saucepan over medium-high heat, until fragrant and begins to pop, about 5 minutes.
3. Add water (or broth) and salt, and bring to a simmer.
4. Cover pan and turn the heat down to low, simmering until the quinoa is tender and the liquid is absorbed, 18-20 minutes.
5. Remove the pan from heat and let sit, covered, for 5-10 minutes.
6. Fluff quinoa with fork and serve!

This most basic quinoa recipe serves as a great base to build on. Stir in olive oil, herbs, sauteed onions and garlic once the quinoa is finished cooking. Or, let cool, add fresh chopped veggies and dress with a little vinaigrette.

Summer Berry Pavlova (Gluten-Free, Dairy-Free)

It’s not too often I go into full baking mode. Usually for me, baking means something quick, easy, and with enough healthy substitutions that it barely slides as a dessert. There are a few times a year I go all-in, break out elaborate recipes, and cut no corners. Making this Summer Berry Pavlova was one of those times.

Summer Berry Pavlova (Gluten-Free, Dairy-Free)

A meringue dessert, pavlova is naturally gluten-free and easy to adapt to be dairy-free. Even better, it’s a recipe where no one will mind, or even notice. Honestly, it’s that good. The pavlova I made disappeared in just a few minutes. While it’s not too difficult to make, it is a little time consuming. However, with fresh summer berries at their peak, you have enough of a reason to go ahead and whip up this treat.

Summer Berry Pavlova (Gluten-Free, Dairy-Free)
adapted from Epicurious.

Makes 8 servings

Ingredients
For Meringue:
• Earth Balance or other non-dairy shortening (for greasing pan)
• Powdered sugar (for dusting pan)
• 1 cup white sugar
• 1/2 cup light brown sugar, packed
• 1 1/2 tbsp corn starch
• 1 1/2 tbsp vanilla extract
• 2 tsp white vinegar
• 6 egg whites
For Berries:
• 1 1/2 pounds of mixed berries (strawberries, blackberries, raspberries, blueberries)
• 2 tbsp granulated sugar
For Cream:
• 1 can of regular coconut milk (refrigerated overnight)
• 1 tsp vanilla extract

Equipment
• 3 8-inch cake pans
• parchment paper

1. Preheat oven to 275º F. Grease the pans with shortening and dust with powdered sugar. Shake off any excess. Line the bottom of each pan with a round of parchment paper.
2. Mix white sugar, brown sugar, and cornstarch in a medium bowl until well-incorporated. Set aside.
3. In a small bowl, stir together vanilla and vinegar. Set aside.
4. In a large bowl, beat egg whites using an electric mixer at medium speed until they hold soft peaks, about 5 minutes.
5. Increase the speed to medium-high and add the sugar mixture one tablespoon at a time. Once all the sugar mixture has been added, continue to beat for one minute.
6. Add the vinegar mixture and beat at high speed until the meringue holds stiff peaks, about 5 minutes.
7. Distribute the meringue evenly into the three pans, smoothing out the tops with a spatula. Bake in the oven for 1 hour, or until they form a crisp and dry crust on top.
8. Once finished baking, turn off the oven and prop open the door slightly using a wooden spoon. Leave the meringues inside the oven to cool for 1 hour.
9. Once cool, remove the meringues from the oven and use a knife to loosen from the sides of the cake pans. Carefully turn meringues over onto a plate and out of the pans. Peel off the parchment paper, and then flip back right side up.

Summer Berry Pavlova (Gluten-Free, Dairy-Free)

Prepare berries:
1. Wash berries and combine in large bowl (quarter and remove stems if using strawberries). Toss with sugar and let sit at room temperature for up to 1 hour.

Prepare cream:
1. Turn the coconut milk can upside down and open. Pour off all the coconut water sitting on top, and reserve for another use (smoothies!).
2. Scoop out the thick coconut cream left in the can into a large bowl. Add vanilla extract.
3. Beat coconut cream on high using an electric beater until it becomes light and airy, resembling whipped cream, 3-5 minutes.

Assemble dessert:
1. To assemble the pavlova, stack meringue on a serving plate, followed by one third of the whipped cream and topped with one third of the berries. Repeat with two remaining layers of meringue, cream, and fruit.

Eat immediately after assembling, and don’t count on leftovers.

Half-Sour, Whole-Delicious Refrigerator Pickles

It’s pickle season my friends. Cucumbers are abundant at farmer’s markets and just begging to be brined.

Cucumbers ready to pickle

I’ve always loved pickles. I have this vivid childhood memory of going to a flea market in Florida with my grandparents that had a pickle stand. Not just a pickle stand, but a “Pickle on a Stick” stand. Barrels and barrels of different types of pickles, served up on a stick, the ever so convenient snack. What an idea. I’m still waiting for the “Pickle on a Stick” idea to catch on. For now, I make my own pickles at home.

Half-sour are my favorite pickles to make. They’re crunchy, garlicky, and hold on to that fresh cucumber flavor. I almost always make refrigerator pickles (rather than canning) because it’s quick, easy, and they’re ready in a week. Refrigerator pickles don’t last as long as canned and should be eaten within a month, but that’s never a problem in my house.

Half-Sour Refrigerator Pickles

Makes as many pickles as you can stuff into a quart-sized jar (about 10)

Ingredients
• 4 cups of water
• 1/8 cup of kosher salt (not sea salt)
• 8-12 small cucumbers (Gherkins or Kirbys)
• 3 cloves of garlic
• 1 tbsp fresh dill, or 1 tsp of dried dill
• 1 tsp coriander seed

Equipment
• quart-sized glass jar with air-tight lid

1. In a small saucepan, bring 4 cups of water to a boil.
2. Remove water from heat and add salt, stir until dissolved.
3. Wash cucumbers. Leaving them whole, put cucumbers into a very clean glass jar. You can pack them in fairly tightly.

Half-Sour, Whole-Delicious Refrigerator Pickles

4. Peel and lightly smash the garlic cloves with a knife. Add to the jar, along with the dill and coriander.
5. Pour hot salt water into the jar, making sure that all cucumbers are submerged. You may have extra water, that’s okay. Seal jar with the lid.
6. Let the jar come to room temperature, and then move into the fridge. Your pickles will be ready to eat after a week, and will keep in the fridge for up to a month!

Kombucha: An Introduction

I couldn’t go too long without writing about kombucha. It’s one of my favorite things to make, drink, and share. Effervescent, sweet, and tangy, Kombucha is fermented tea. It has been around for hundreds of years (at least), and fallen in and out of fashion here in the US.

Kombucha is claimed to help with digestion, detoxification, treat arthritis, and boost your immune system. While the jury is still out on some of these benefits, kombucha is at the least a tasty, highly probiotic drink, known to be filled with gut-healing bacteria. Personally, I find it to be a great pick-me-up, sometimes replacing coffee. My boyfriend has said it cures his headaches. But above all else, I drink kombucha because it is delicious.
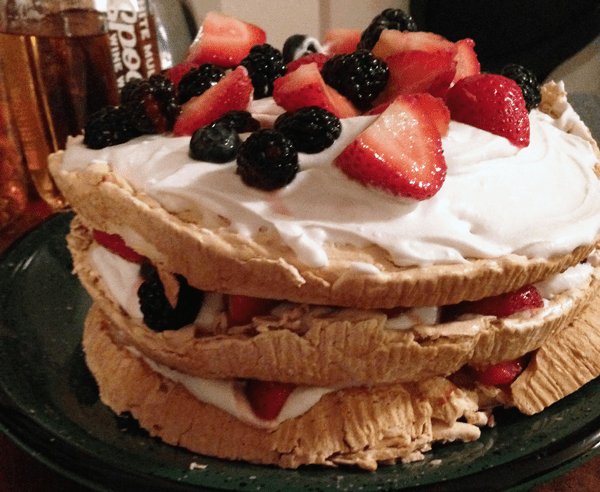
bottlesFresh bottled booch

I don’t remember the first time I tried kombucha, but after that first sip, I never went back. It’s both tart and sweet, with a deep fruit-like flavor. The scent is reminiscent of apple cider vinegar, which can be a deterrent for some. The first kombucha I had was GT’s, which is widely available and often blended with fruit juice. It’s a great starter kombucha. Unfortunately, the stuff is expensive, so once I was hooked it didn’t take long to think about making my own. Turns out, it’s remarkably easy, and there is no shortage of online resources to support you along the way.

Before brewing kombucha, you need to learn about the SCOBY. A SCOBY is a Symbiotic Colony Of Bacteria and Yeast. It’s rubbery, slimy, and generally unattractive, but this culture is responsible for making all the good stuff happen. In just a few days, the SCOBY will turn sugary tea into fizzy, beloved booch.There’s a few ways to get your hands on one. If you happen to know a fellow kombucha brewer, they are likely to have an extra on hand. Every time you make a batch, the SCOBY produces a second baby SCOBY that can be used separately. If you can’t get one from a friend, it’s just as easy to get a good one at a local home brewing store or online. Cultures for Health is a trusted online shop, but you’ll find tons more on Amazon. If you’re feeling particularly ambitious, you can make your own, though I don’t have any experience doing so myself.

scoby-close
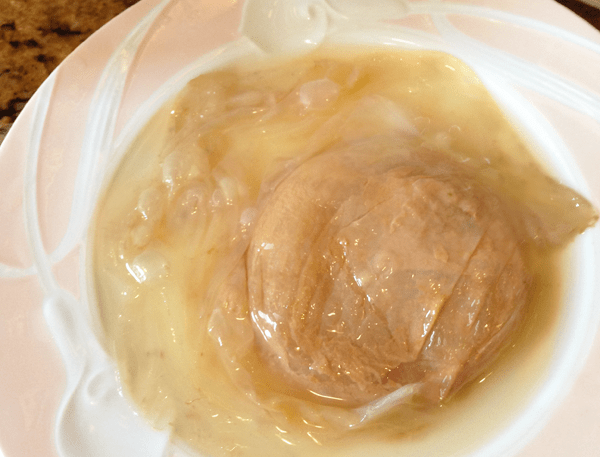
My odd-looking current SCOBY, a smaller mature one with a larger young one attached

Want to get started? Below is my tried and true recipe for basic kombucha.

Basic Kombucha

Makes 1 Gallon

Ingredients
• 14 cups of water
• 8 teabags or 4 tbsp of organic green or black tea (no flavored teas)
• 1 cup of organic sugar
• 1 SCOBY
• 1-2 cups of starter tea (reserved from another batch of kombucha or wherever you got your SCOBY from)

Equipment
• a large glass container with an open top (at least 1 gallon)
• a wooden or other non-metallic spoon (contact with metal will damage the SCOBY)
• a non-metallic strainer
• cheesecloth or a paper towel, and a rubber band

1. Bring 6 cups of the water to a boil, then remove from heat. Add the tea and let steep for 4 minutes. Then remove the tea and add the cup of sugar, stirring until it is fully dissolved. Add the remaining 8 cups of water to help bring the tea to room temperature.

2. Once the tea is at room temperature, pour it into your glass container (it is important not to be warmer to prevent damaging your SCOBY). Then add both your SCOBY and starter tea to the container.

3. Cover the top of the container with the cheesecloth or paper towel and secure with a rubber band. Your tea is now ready to ferment! Find a place for it that will remain at room temperature and out of direct sunlight. The fermentation process can take anywhere from 5 days to 2 weeks. The longer it ferments, the less sweet and more sour the kombucha becomes. I’ve found that 7-9 days is my sweet spot, but feel free to taste your kombucha along the way to figure out when it’s just right for you!

doublebrewstrain2
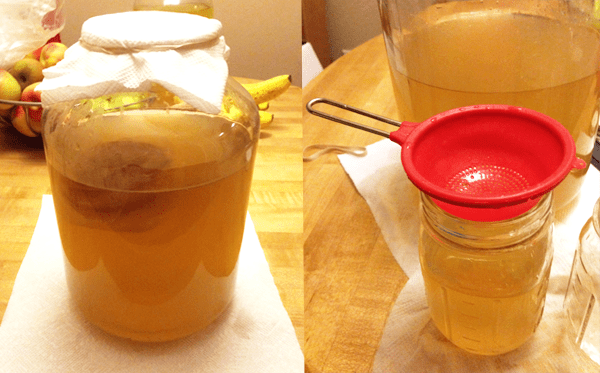
Brewing and straining

4. Once you like how your kombucha tastes, you are ready to move from fermentation to bottling. Remove the SCOBY with your non-metallic spoon along with 1-2 cups of the kombucha. You can start another batch of kombucha with this right away or store in a closed jar in the fridge for up to 3 weeks.

5. Pour the kombucha from your container into smaller, air-tight containers using your non-metallic strainer to filter out any of the slimy yeast that formed in the process. It’s safe to drink, but not necessarily enjoyable. Make sure to leave at least an inch of room at the top of the jar for air, to prevent your bottles of carbonated booch from exploding.

At this point, the kombucha is technically finished. However, I ALWAYS do a second fermentation to make my booch more bubbly.

6. For second fermentation, seal the containers and leave out at room temperature for another 24-48 hours, then move to the fridge. Do not leave out of the fridge for more than a few days, because again, all that carbonation could cause the containers to burst.

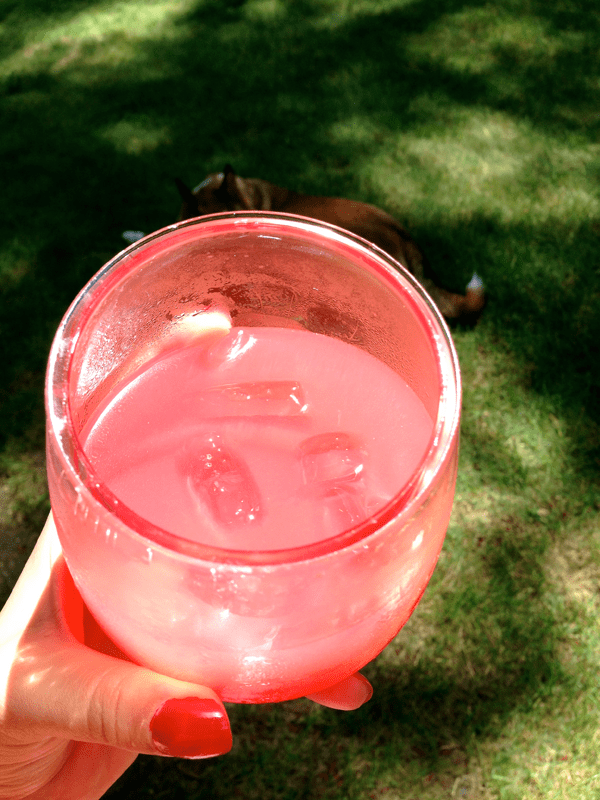
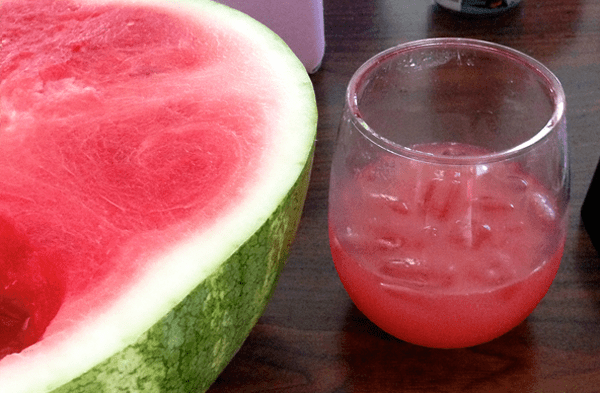
Second fermentation is also your chance to add fruit juice to make flavored kombucha. I’ll have recipes coming soon, but in the meantime I suggest exploring Phickle, my favorite blog. There are some fantastic recipes, including this seasonal Cherry Kombucha.

cherrybooch
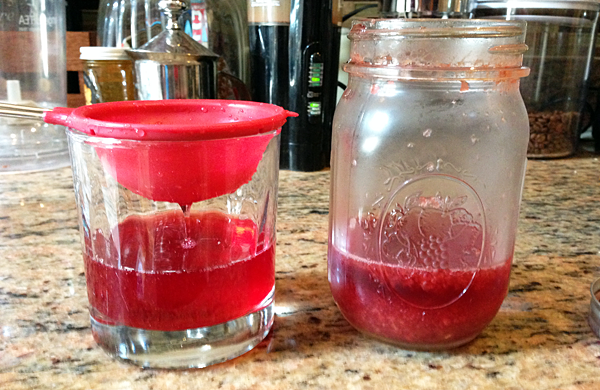
Phickle’s cherry kombucha

I hope you enjoy the kombucha adventure as much as I do. If you run into any questions, leave a note for me in the comments, I would love to chat and help out.

Watermelon-Cucumber Cooler (Best Cocktail Ever)

Each year for the Fourth of July, we have a party with family and friends at my boyfriend’s parent’s summer house. On a river in New Jersey, it’s one of our favorite places to be.

sweetwater

We cook up quite a feast, the local seafood and farmstands give us a lot to work with. I usually end up with the duty of making cocktails for the crowd. Naturally, I want a drink that makes the most of the delicious produce the summer has to offer. I’ve done sangria and mojitos, which are all good, but last year I really found a winner. This Watermelon-Cucumber Cooler recipe was incredible. Made from a base of fresh watermelon and cucumber, it requires a little bit of work but is totally worth it.

cooler-600

Watermelon-Cucumber Cooler
Adapted from Martha Stewart.

Makes 4 Cocktails

Ingredients
• 5 cups of seedless watermelon (I used one small watermelon)
• 1 large english cucumber
• 1/4 cup fresh lime juice (from 2 limes)
• 2 tbsps honey
• 2/3 cup vodka (rum and tequila would work great as well)

Equipment
• Blender
• Fine-Mesh Sieve (you can opt not to use a sieve, the drink will just be thicker)

1. Cut the watermelon into chunks, or scoop out using a metal spoon. Put watermelon in blender and puree until liquified into juice. Pour the watermelon juice through the sieve into a large bowl or serving container. Use a spatula or back of a spoon to push down on pulp to squeeze out all the juice.

2. Peel the cucumber and cut into large chunks. Puree cucumber in blender until liquified. Add the pureed cucumber juice through the sieve to the watermelon juice in the bowl/container.

3. In a small bowl, mix the lime juice and honey. Stir the mixture into the watermelon-cucumber juice, then add the vodka or other liquor of your choice.

4. Taste and adjust sweetness if needed. Split into four glasses and serve with ice.

Enjoy!

watermelon-600